Contact

Tel: 86-755-84875752
Fax: 86-755-84875750

Address

4F,Longyuntong Building, No. 164-5 Pengda Road, Longgang District, Shenzhen

Understanding Resin Types for Beginners: Epoxy vs. UV Resin

diy uv resin 5
Picture of ZDS™
ZDS™

Chemical

Starting your journey in the world of resin art can be an exciting endeavor, filled with creativity and a wide array of beautiful projects to explore. As a beginner, it’s essential to understand the different types of resins available and decide which one suits your needs before diving into your first project. Let’s delve into the two most accessible types of resin for newcomers: epoxy resin and UV resin.

Epoxy Resin: Ideal for In-Depth Projects

Epoxy resin is a two-part system consisting of a resin and a hardener. When mixed together, they create a chemical reaction that leads to the resin curing and hardening over time. It’s known for its strong bond and durability, making it a popular choice for a variety of crafts and DIY projects.

Pros of Epoxy Resin:

4a381c3b 2f4d 4efb bbec 34aa77239ec8

Longer Working Time

Epoxy offers a longer open time, which can range from 20 minutes to several hours. This allows beginners ample time to mix, pour, and manipulate their project.
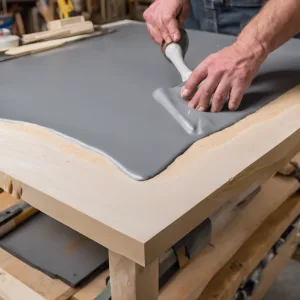
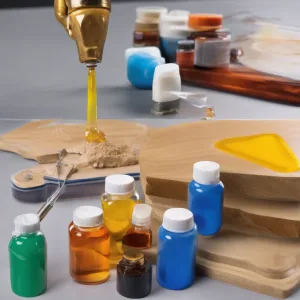
d84fd2e5 1aa7 4437 a4e6 9c7775a9ea9b

Versatility

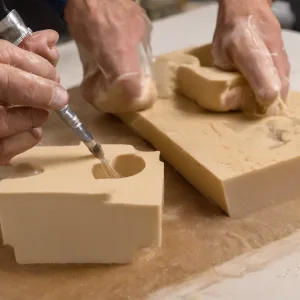
It’s perfect for larger projects like river tables, countertops, and deep molds because it can be poured in thick layers.
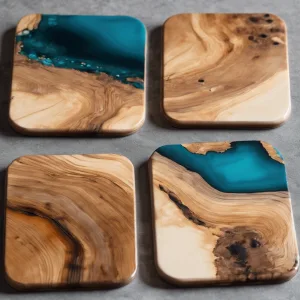
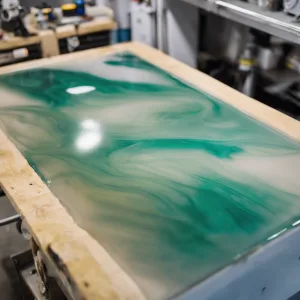
5374e6f3 2bf6 4522 aa6c 4e42f11f60dd

Durable Finish

Once cured, epoxy is tough and resilient, making it suitable for functional art pieces like coasters or tabletops.

Cons of Epoxy Resin:

  • Curing Time: Epoxy takes longer to cure, usually between 12-72 hours. Patience is key!
  • Sensitivity: The mixing ratio must be precise, and environmental factors such as temperature can affect the curing process.
  • Safety Precautions: Proper ventilation and protective gear are necessary because uncured epoxy can release harmful vapors.

UV Resin: Quick and Convenient

UV resin is a one-part system that cures quickly under ultraviolet light, typically using a UV lamp or direct sunlight. Its fast-curing property makes it ideal for small-scale projects and jewelry making.

Pros of UV Resin:

  • Fast Curing: UV resin can cure within minutes under UV light, allowing rapid project completion.
  • Ease of Use: No need to mix with a hardener; it’s ready to use straight from the bottle.
  • Ideal for Small Projects: Perfect for jewelry, casting small items, or adding highlights to larger pieces.

Cons of UV Resin:

  • Limited Working Time: You have less time to work with UV resin before it starts to cure under light exposure.
  • Thickness Limitations: It’s generally not suitable for thick pours, as the UV light may not penetrate deeply enough to cure the resin fully.
  • Cost: UV resin can be more expensive than epoxy resin per ounce, which may add up over time for larger projects.

Making Resin Art for Beginners: A Step-by-Step Guide

As a novice in resin art, starting with simple projects can help you grasp the basics and gradually build your skills. Here’s how to get started:

Step 1: Choose Your Resin Type

Decide whether epoxy or UV resin is best for your project. Consider the size, working time, and desired finishing before making your choice.

8ab5e3d0 cf47 4a5d b6b4 39a1e254aa28

Step 2: Gather Supplies

You’ll need:
  • Selected resin (epoxy or UV)
  • Silicone molds or a prepared surface
  • Mixing tools (sticks and cups)
    Protective gear (gloves, mask, etc.)
  • Colorants or embellishments (dyes, glitters, etc.)
  • UV lamp (if using UV resin)
38b4b605 039f 424a b565 4b405eecba74

Step 3: Prepare Your Workspace

You’ll need:
Ensure a clean, dust-free workspace with good ventilation. Cover your work area with wax paper or a silicone mat for easy cleanup.
a2521f9b 1b84 47e3 9a77 465146a62627

Step 4: Mix and Pour (for Epoxy Resin)

If using epoxy, follow the manufacturer’s instructions to mix your resin and hardener correctly. Pour it into your mold or onto your surface, then add any desired colorants or objects.
8b20948c 315d 4b4d 8843 df552b6e3073

Step 5: Cure the Resin

For epoxy, let it sit undisturbed during the curing process, which can take several hours to days. If using UV resin, expose it to UV light until it’s entirely cured, often just a few minutes.
4cc28350 af18 46cc 8c51 20cf5b0bd361

Step 6: Demold and Finishing Touches

Once fully cured, remove your piece from the mold. You may need to sand edges or apply a top coat for a polished finish.
048f134c a232 4e36 9262 2f6237b91258

Final Thoughts

Both epoxy and UV resins have their unique benefits and challenges. As a beginner, you might prefer starting with UV resin for smaller projects due to its simplicity and quick results. However, if you’re up for the challenge and interested in larger or thicker pieces, epoxy might be the right path for you. Regardless of your choice, resin art requires practice and patience, but the rewards are a stunning array of personalized creations. Embrace the process and let your creativity flow!

You might also enjoy

Are you looking for suppliers? Please leave your contact information and we will provide a free test sample.

Scroll to Top
Get Free Sample Testing!

Look out for emails from @zdschemical.com.